5 Advanced Techniques for Applying Rhinestones
Posted by Rhinestones Unlimited on Aug 27th 2024
Rhinestones add a touch of glamour to any project. Whether you’re embellishing a dress for a special occasion or adding sparkle to your latest DIY, knowing how to apply rhinestones with advanced techniques can take your creations to the next level. Let’s explore some techniques that will help you achieve the perfect glimmer and glam.
Hotfix vs. Flatback Rhinestones
There are two main types of rhinestones: hotfix and flatback. Hotfix rhinestones have a heat-activated adhesive on the back that allows them to stick to fabric when heated with an iron or a specialized applicator tool. Flatback rhinestones, on the other hand, require a separate adhesive, such as E6000 or Gem-Tac, to adhere to surfaces.
While both types can achieve beautiful results, hotfix rhinestones tend to be more durable and longer-lasting. You can also apply them in larger quantities and in more intricate designs compared to flatback rhinestones, which may require more precision and patience during application.
Preparing the Surface
Before applying rhinestones, it’s important to prepare the surface. This is especially crucial for hotfix rhinestones, as they require direct contact with heat in order to activate the adhesive.
For fabric surfaces, make sure to pre-wash and dry the fabric before adding rhinestones. This will remove chemicals that may interfere with the adhesion process. For other surfaces, such as paper or plastic, make sure they’re clean and free of debris that may prevent the rhinestones from adhering properly. Scratching the surface with a file can also help longevity of your design application.
Using a Hotfix Applicator Tool
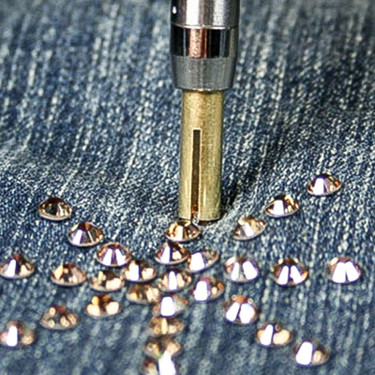
If you’re working with hotfix rhinestones, investing in a hotfix applicator tool can make the process much easier and more precise. This handheld tool has a heated tip that allows you to pick up and place individual rhinestones onto your project. It also helps to activate the adhesive quickly and evenly.
To use the hotfix applicator tool, plug it in and wait for it to heat up. Then, touch the tip of the tool to the top of a rhinestone until it adheres to the tool. Place the rhinestone onto your surface, and hold the tool in place for a few seconds to activate the adhesive.
Adding Extra Dimension With Rhinestone Settings
Rhinestones come in various shapes and sizes, but did you know that different settings can add dimension to your designs? For example, claw or prong settings have small metal claws that hold the rhinestone in place while adding an edgy look. Tiffancy or Rim Settings have a smooth metal rim around the edge of the rhinestone for a more subtle effect.
Play around with different settings to see which ones best complement your project.
Mixing and Matching Rhinestones
Don’t be afraid to mix and match different sizes, shapes, and colors of rhinestones in your designs! This can add a unique and eye-catching element to your creations. Just make sure to plan out your design beforehand and experiment with placement before permanently adhering the rhinestones.
Rhinestones are versatile and beautiful additions to any craft or fashion project. By mastering these advanced techniques for applying them, you can create stunning, professional-quality designs.
RhinestonesU.com offers a wide array of rhinestones online. Our rhinestones come in various sizes, shapes, and colors to suit all your crafting needs. And with affordable bulk pricing, you can create without breaking the bank!

 Bulk
Bulk Crystal
 Crystals
  Sales &