 Bulk
Bulk Crystal
 Crystals
  Sales &
DIY Hat - Sparkle Your Melon
Posted by Rhinestones Unlimited on Dec 13th 2019
Check Out This Great DIY gift idea from Miss DIY Sparkle
Who wouldn't want to be wearing one of these sparkling hats? No one that we can think of. Such a stylish DIY project that might even make the need for wearing a hat fun this winter season when you can look this cute! A great gift giving idea too for anyone on your list that loves herself some bling. Pick out a warm weather hat or one just to look chic in, and let's get to sparkling this baby!
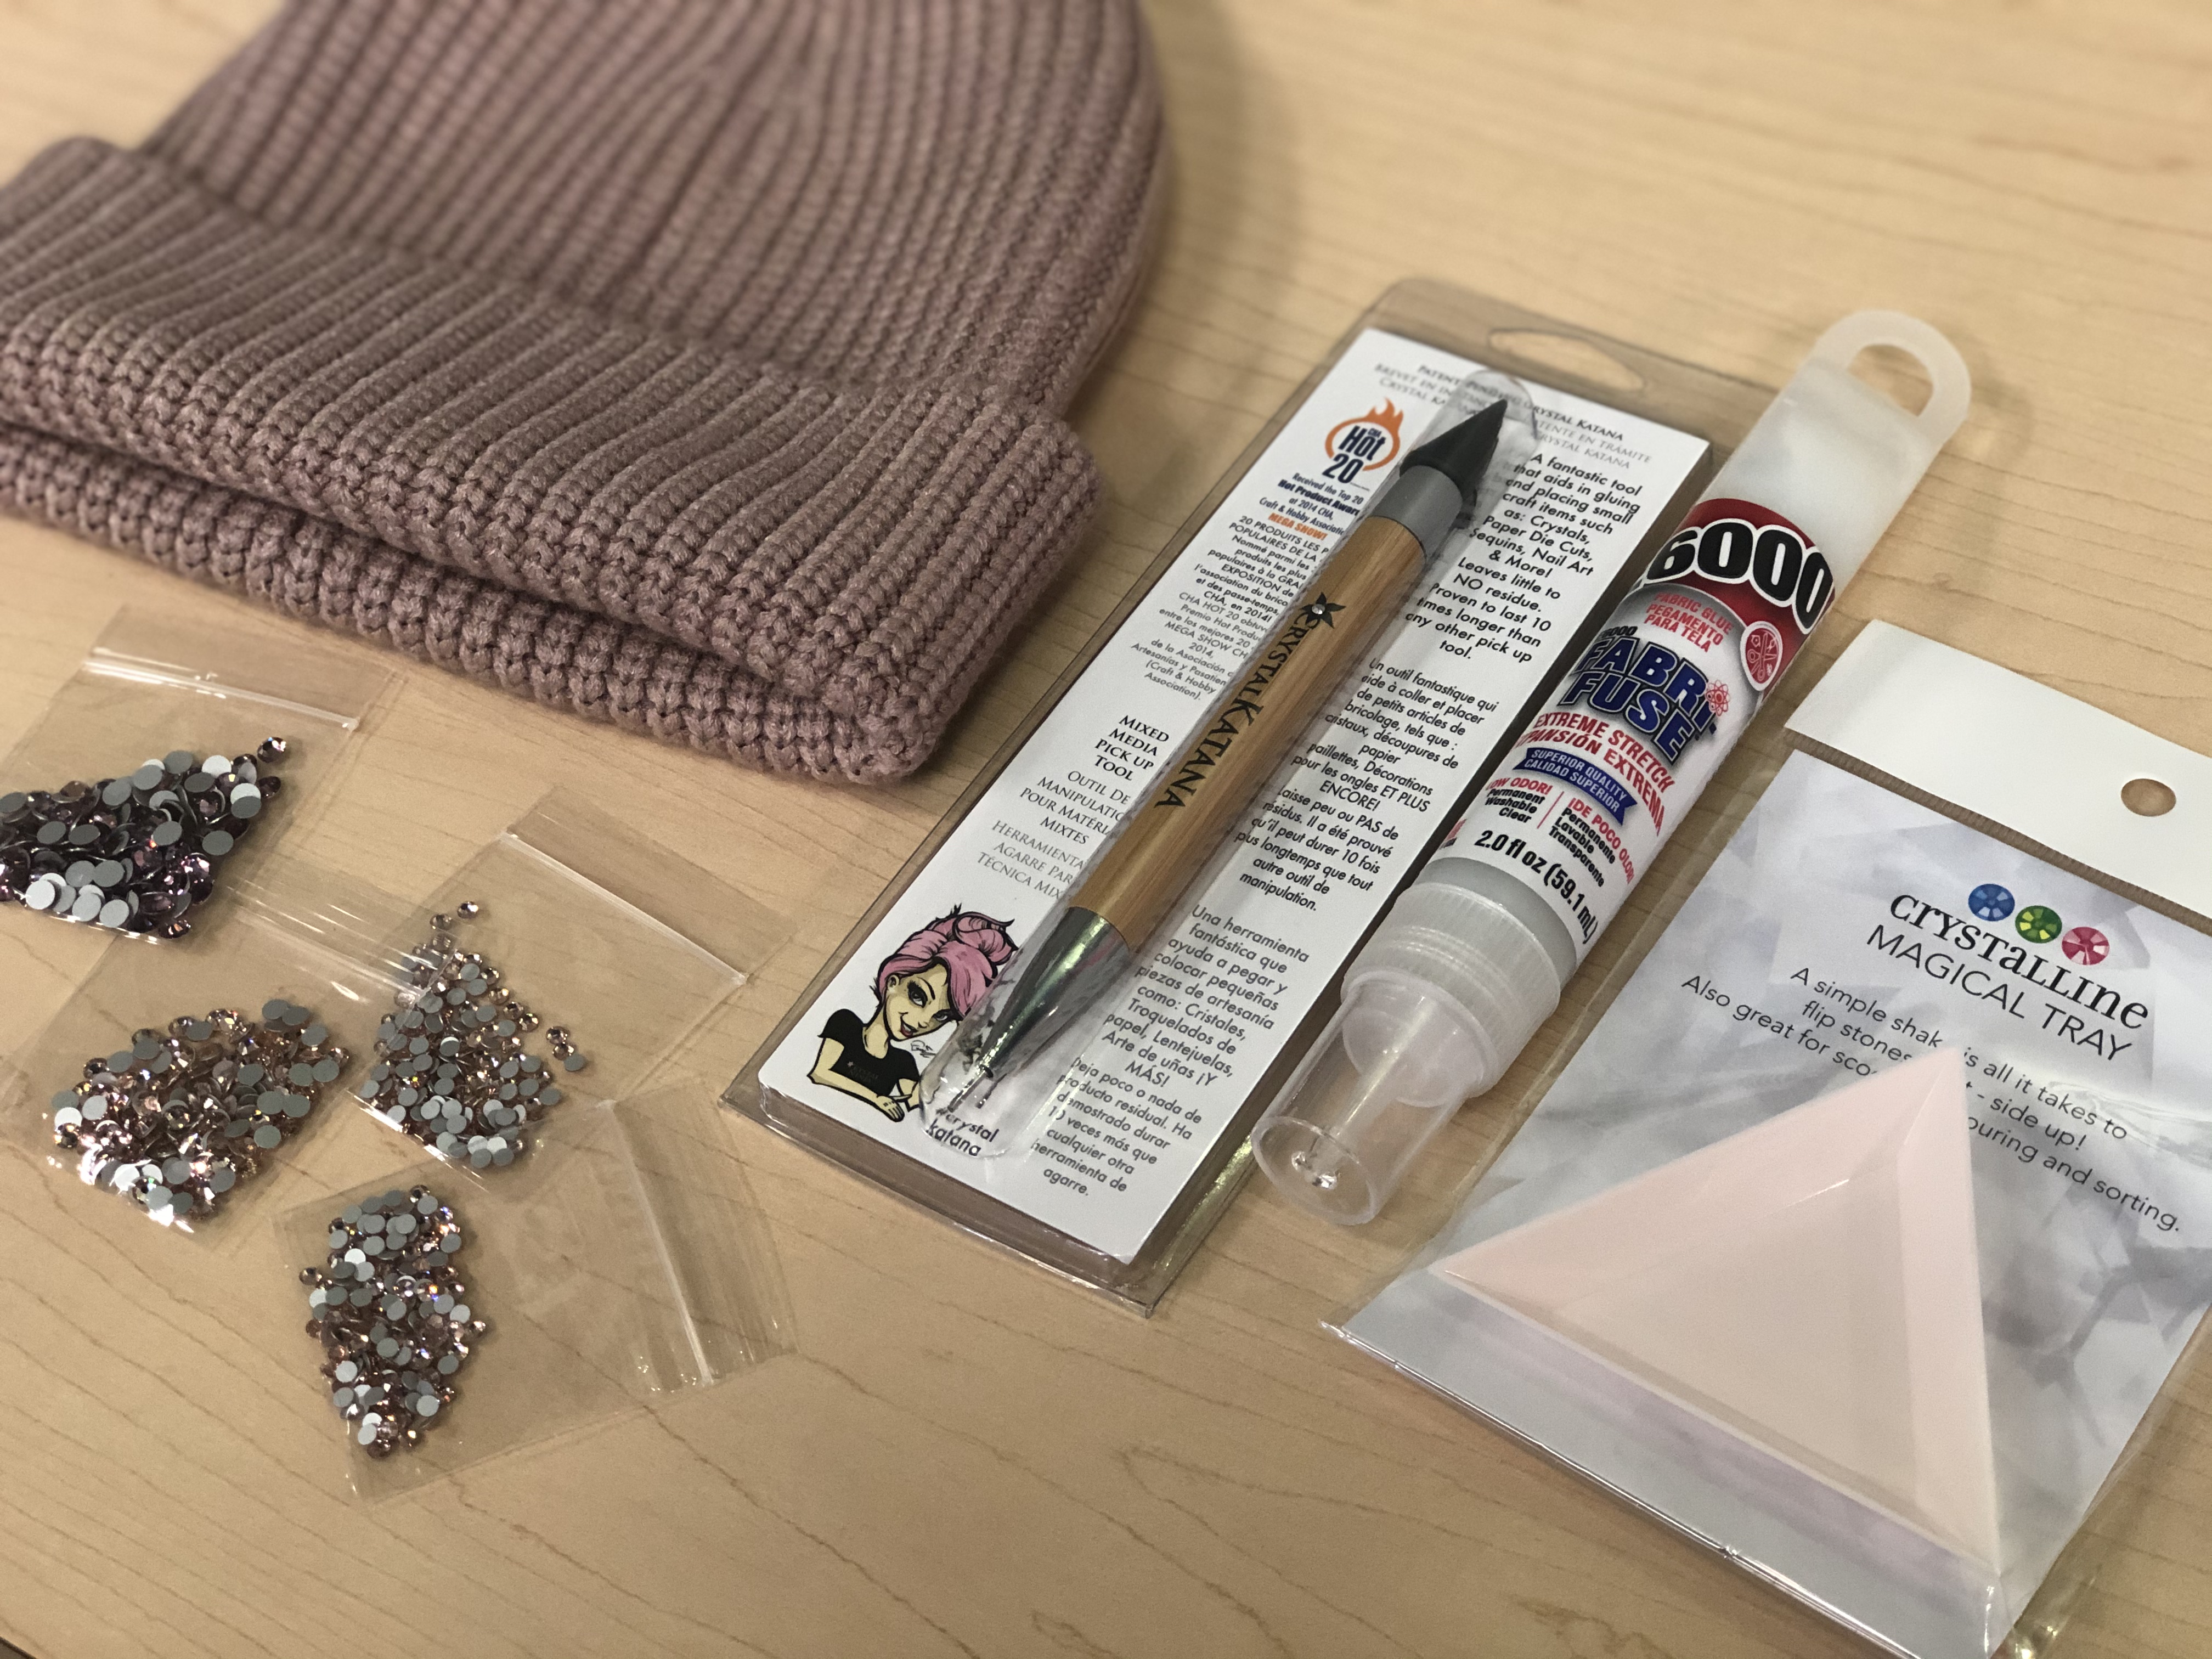
Supplies:
- E6000 Fabri-fuse
- Crystal Katana
- Crystalline Magical tray
- Preciosa Crystals in Vintage Rose 16ss and 12ss, and Light Amethyst 20ss
How to:
Step 1: Empty your Preciosa crystals into your magical tray and give the tray a slight shake and it will magically flip the crystals over, crystal side up so they are easy for you to pickup.
Step 2: Apply a few small dots in a straight row of the E6000 Fabri-fuse glue onto the hat. Then, using your pick-up tool, pick up one crystal at a time and press into the glue dots on the hat. Continue this until this row is complete, allowing dry time as needed. I started with the center of the cuff, with the Preciosa Light Amethyst 20ss crystals, making a straight line.
Step 3: Using Preciosa Vintage Rose 16ss, make an additional two rows using a window pattern, above the center line. Using the same size and color, Vintage Rose 16ss, continue by making an additional two rows using a window pattern, below the center line. You should now have 5 rows completed. One center row of Light Amethyst 20ss and four rows of Vintage Rose 16ss.
Step 4: Using Preciosa Vintage Rose 12ss, make an additional three rows using a window pattern, just above the two 16ss rows. Using the same size and color, Vintage Rose 12ss, continue by making an additional three rows using a window pattern, just below the two 16ss rows.
Step 5: Now put on your DIY hat and brave this cold weather with a sparkly melon, feeling shiny on the inside and out!


 Light Amethyst
  Vintage Rose
CREDITS
Strassing: Miss DIY Sparkle