


The Ultimate Guide to Applying Sew-On Rhinestones
Posted by Rhinestones Unlimited on May 29th 2024
Glamorous, brilliant, and attention-grabbing, sew-on rhinestones are a crafter’s dream come true. Whether you’re embellishing a costume, adding sparkle to everyday clothing, or creating custom designs, sew-on rhinestones can elevate your projects from ordinary to extraordinary. In this ultimate guide to applying sew-on rhinestones, we’ll cover everything you need to know to create stunning designs with these sparkling gems.
What Are Sew-On Rhinestones?
Sew-on rhinestones are crystals crafted with a hole through which thread can pass. This simple design makes them perfect for secure attachment by stitching. They come in various materials, shapes, and sizes, each offering a different aesthetic to your projects.
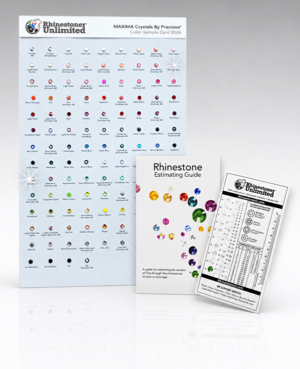
You can categorize sew-on rhinestones into three main types: crystal with precision cut faceting, glass with molded faceting and acrylic rhinestones. The high-quality crystal type, such as our Starcut Crystal sew-on rhinestones, offer a high level of brilliance and can be found in many colors. Acrylic and glass rhinestones may be a more affordable alternative to precision cut crystal, but they are not as readily available and definitely don't offer comparable sparkle.
Understanding the basic differences between these types is the first step in choosing the right rhinestones for your project.
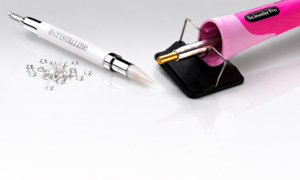
Tools and Materials Needed
To start applying sew-on rhinestones, you will need a few materials and tools ready at your workstation:
- Sew-on rhinestones: Choose from a diverse range of materials, sizes, and colors.
- Fabric: The canvas for your design should be clean and smooth.
- Thread and needle: Use a thread color that complements the rhinestones to create a seamless look.
- Thimble: This will prevent sore fingers during extended sewing sessions.
- Glue: This is optional, but it can provide a temporary hold before you start sewing. As an alternative, some customer use a strong glue and never actually sew!
Prepare these tools, and you’re ready to start crafting your rhinestone masterpiece.
Preparation Steps
Ensure you prepare the foundation of your project properly to guarantee the success of the finished piece. To get your fabric and rhinestones ready, first wash and dry your fabric to eliminate any shrinkage that can occur after sewing on the rhinestones. Then, group your rhinestones by size, color, or shape, depending on the pattern you intend to use. Finally, mark the design by using a fabric chalk or soluble marker to mark the spots where you’ll sew each rhinestone. This will guide you as you begin to embellish your fabric.
By diligently preparing your materials, you set the stage for a smooth application process.
Application Techniques
Applying sew-on rhinestones requires patience and precision. Here’s a detailed guide to help you attach them securely to your fabric:
Step 1: Positioning the Rhinestone
Place the rhinestone on the marked spot and hold it with your finger or with a small dab of glue for temporary adhesion.
Step 2: Sewing the Rhinestone
Starting from the back of the fabric, pass the needle through the fabric and the hole of the rhinestone in a straight line. Take care not to pull too tight, as this can distort the fabric.
Step 3: Securing the Rhinestone
Repeat step 2 for three to five stitches, ensuring the rhinestone is firmly attached. Finish with a secure knot on the back of the fabric.
For larger designs, tackle one section at a time, ensuring each rhinestone is secure before moving on. The key is to stitch evenly and firmly without damaging the fabric or the rhinestones.
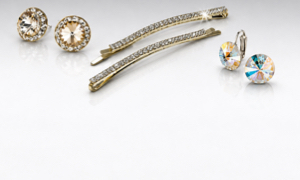
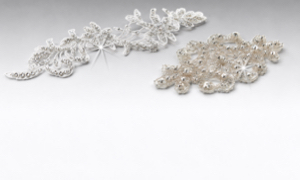
Creative Design Ideas
The freedom to create is one of the most exciting aspects of working with sew-on rhinestones. Here are a few design ideas to get your creative juices flowing:
- The celestial scene: Create a night sky with blue and silver rhinestones, depicting constellations or shooting stars.
- Floral fantasia: Adorn a garment with an intricate floral pattern, using different shades and sizes to create depth.
- Personal monogram: Embellish with your monogram or name, or try spelling out words or phrases.
Designing with sew-on rhinestones offers a prismatic palette to infuse any piece with your unique vision.
Maintenance and Care Tips
After you’ve spent the time carefully stitching each rhinestone, you’ll want your creation to last. Follow these maintenance tips to preserve your work:
- Hand wash gently: If washing is necessary, spot clean or hand wash your rhinestone-embellished fabric inside-out to protect the rhinestones from abrasive contact.
- Air dry: Lay the item flat to dry to prevent the weight of wet fabric from pulling on the attached rhinestones.
- Store appropriately: Store your rhinestone-embellished items in a soft cloth pouch to avoid scratching or breaking the rhinestones.
With proper care, your sew-on rhinestones will continue to shine and charm for years to come.
Common Mistakes To Avoid
Even the most skilled rhinestone aficionados can make mistakes. A couple of common ones to watch out for include using the wrong-sized needle and adding inconsistent stitching. Using a needle that is too big can create large holes around the rhinestone, weakening the fabric. Meanwhile, inconsistent stitches can cause the rhinestone to become loose or the fabric to pucker.
Remember to always be deliberate and gentle when applying a sew-on rhinestone to achieve the best results.
Troubleshooting Guide
If you encounter issues like a rhinestone slipping or not sitting flush, some quick fixes include tightening the stitches and repositioning any crooked rhinestones. If a rhinestone slips, simply tighten the stitches around it, making sure the fabric lays flat. And if a rhinestone is slightly misaligned, carefully remove the stitches and reposition it before securing it again.
With a few adjustments, you can address these issues swiftly and continue with your creation.
Tips for Mastering Sew-On Rhinestones
Now that you have a basic understanding of sew-on rhinestones and how to apply them, it’s time to take your skills to the next level. Here are some additional tips to help you become a master at working with these gems:
- Experiment with different patterns: Don’t limit yourself to traditional designs—play around with different patterns, such as stripes, zig-zags, or even free-form shapes.
- Mix and match: Try combining different types of rhinestones in one design to create a unique look.
- Use templates: For more intricate designs, use a template to ensure your rhinestones are placed accurately.
- Practice on scrap fabric: Before applying rhinestones to your final project, practice on scrap fabric to perfect your technique.
- Take breaks: Sewing on rhinestones can be time-consuming and tedious. Remember to take breaks to avoid fatigue and maintain accuracy in your stitching.
With these tips in mind, you can continue to improve your skills and create even more dazzling designs with sew-on rhinestones.
Sew-on rhinestones are the perfect way to add sparkle to your life. Whether it’s a personalized garment or a piece of home decor, the application process is both a skill and an art. If you’re ready to start creating, RhinestonesU.com offers an extensive selection of sew-on rhinestones in bulk, perfect for all your DIY projects. Invest in good-quality stones and materials, and with this guide to applying sew-on rhinestones on hand, there’s no limit to the radiance you can create!
