 Bulk
Bulk Crystal
 Crystals
  Sales &
DIY Crystallized Ombré Appliques
Posted by Rhinestones Unlimited on Jan 27th 2017
Tutorial Step by Step SELECT YOUR APPLIQUES 
Choose from our 3 styles of mirrored pairs of white DIY appliques here. We recommend picking up one extra applique to use for testing your colors. Our test applique ended up being a perfect hair accessory.
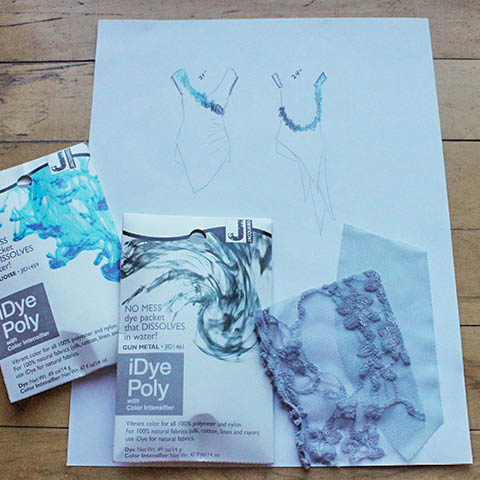
DECIDE ON YOUR DESIGN


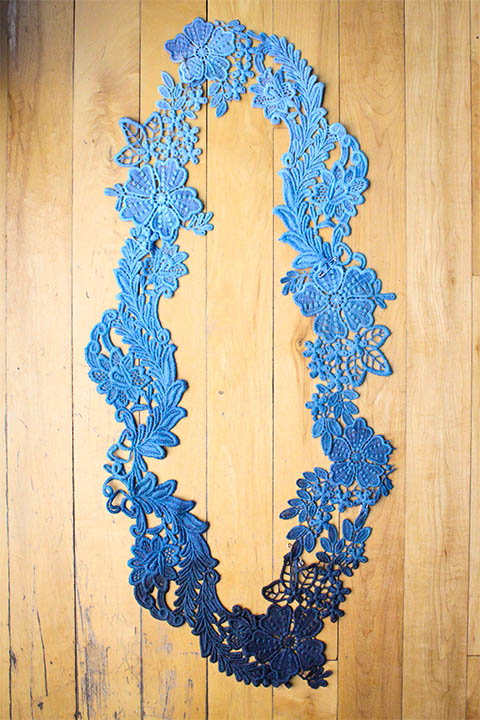
Our plan was to dye an ombré effect onto several appliques for a custom dance costume. We wanted light blue at the top shoulder of a dance costume, gradually getting darker across the chest and then the darkest blue shade at the hip of the costume. Then, a similar ombré along the back of the costume back up to the shoulder. We cut the appliques and pinned them together to get one long piece for dying.
SELECT YOUR DYÉ
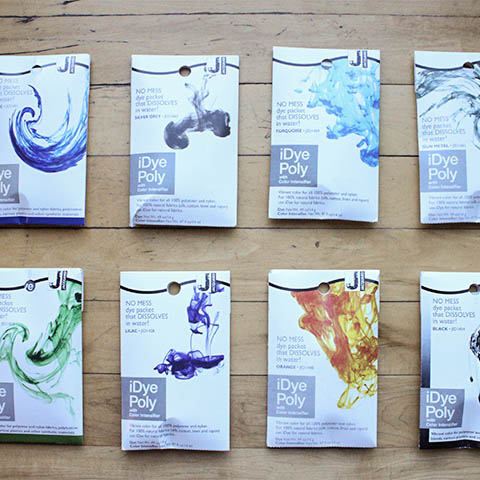
Since these Rhinestones Unlimited DIY appliques are a cotton/poly blend, we chose iDye Poly for use on Natural fabrics including rayon, hemp, linen, cotton, silk, polyester and nylon. iDye Poly offers 46 colors and is a good choice for “quick, easy, no fuss dye jobs, solid color dyeing, single color tie dye”. Dharma Trading Company is a great source for iDye Poly, how to instructions, white dyeable clothing and everything else you can imagine for a successful dye job! Find iDye Poly here.
SELECT YOUR DYE COLOR(S)
Next you will need to decide on the color of dye for your appliques. We chose a shade of light blue and then a charcoal gray and a darker blue to darken the dye bath to help create the ombre. It is nice to have a couple options since it is really just a guessing game how the colors will mix together.
PURCHASE UTENSILS
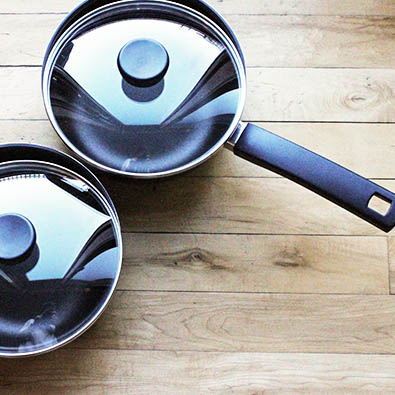
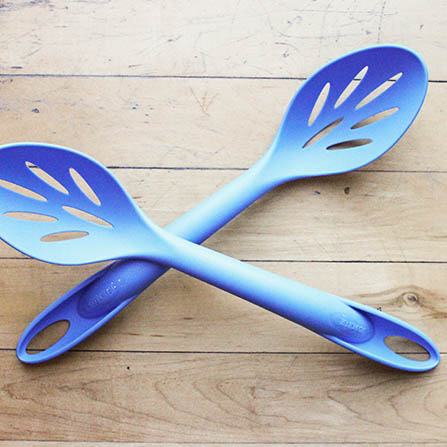
Pots, spoons and any utensil that comes in contact with the dye should not be used for food. We purchased two pots and two plastic spoons from the dollar store for our project. Dyeing is addictive so I am sure we will use them again! Did you know you can dye white tights, fishnets, lycra and stretch lace? Imagine the custom costume looks you can achieve once you get the hang of dyeing! These inexpensive DIY appliques are a perfect first project!
PRE-WASH YOUR GARMENT
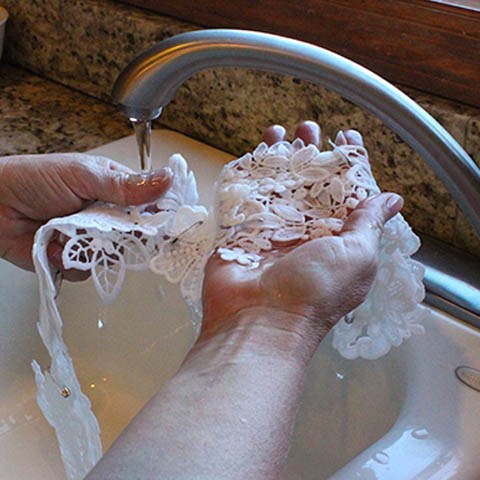
Wash your applique with a detergent. We recommend that you don’t skip this step; it is an important to remove sizings, softeners, finishes, grease and oils.
PREPARE YOUR DYE BATH
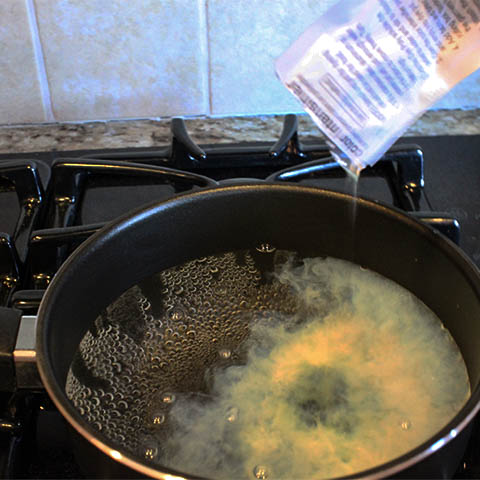
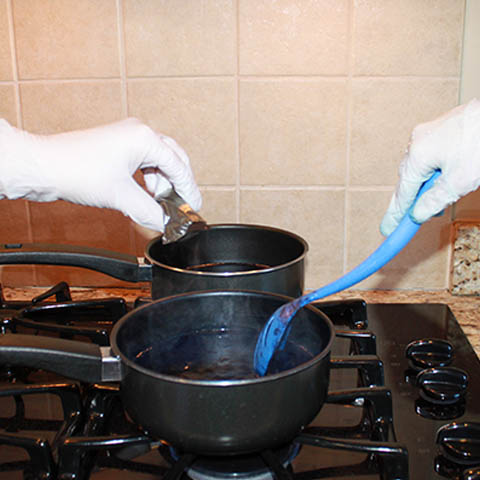
Now, is time to mix your dyes. Remember to start with the lightest colors and small amount of dye – you can always darken the dye bath or soak the applique longer to create a darker tone, however, you cannot lighten the tone very easily. We recommend that you follow the iDye Poly instructions to prepare you dye bath. Make sure you start with the lightest color for your ombré. Test, test, test! Use a piece of the applique or a test applique.
NOTES ON CREATING AN OMBRÉ EFFECT Dharma Trading explains how they did an ombré effect at this link Read Dharma Trading Company’s ombré instructions here. We like their tips on the larger bucket for the dye bath and the pulley system they rigged up.
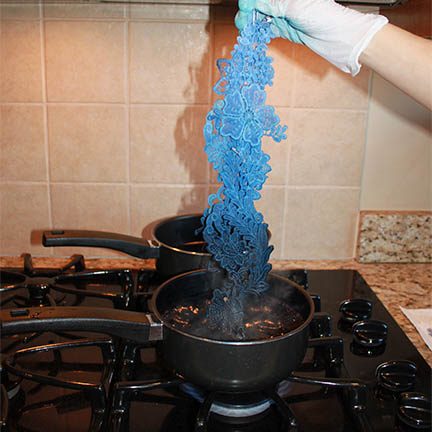
We like the ombré effect of our applique job better though and we think it is because we changed the dye bath as we went. We did not just use one color and leave the appliques in the dye bath longer to create the darker effect. We dyed the light color, then added a little of a darker blue to do the next shade, and then repeated this several times until we finally added some charcoal gray to darken to the darkest shade. We tested the dye bath several times on a white t-shirt before dipping the appliques in the dye bath and we rinsed between each step. It was all an experiment! Enjoy the process and take it slow; no doubt, you will come out with something unique and beautiful!
HOW WE ACHIEVED OUR OMBRE
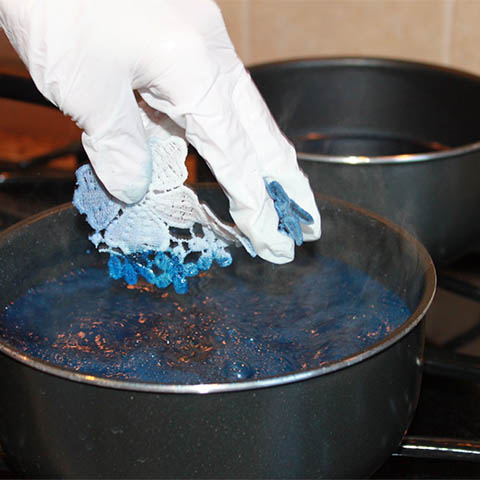
1 After testing, place entire applique in the dye bath of the lightest color.
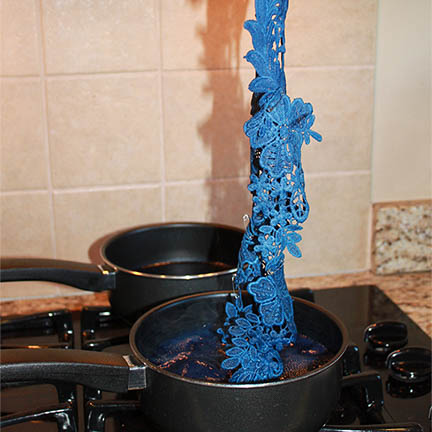
2 Pull applique out slowly to create the ombré effect
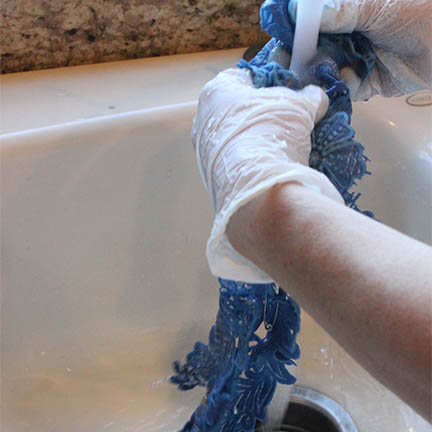
3 Rinse each time you pull the entire applique out of the dye bath. Color will lighten significantly when you rinse.
4 Repeat process in lighter color as many times necessary to achieve the lightest color ombré effect.
Then, add darker dye to the dye bath.
5 Test darkened dye bath until you get the correct color.
Dip the darker end of the applique into the darker dye bath and pull out slowly to create the darker ombré.
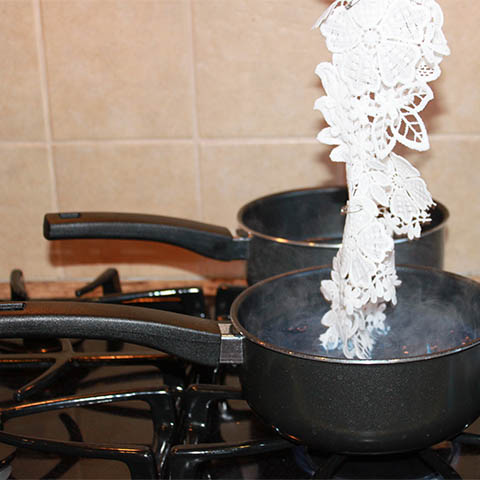
6 Repeat adding dye to darken, testing, dipping and rinsing the applique until you get the look you desire.
When you achieve the look you desire, soak in the soda ash, air dry and iron.
Great job!
SELECT YOUR RHINESTONES

Our favorite part! First decide what quality of crystal you would like to add to your applique - Swarovski® Crystal, LUX Austrian Crystal, Preciosa Czech Crystals, or PriceLess Crystals. Visit www.RhinestonesU.com to choose the quality, size, and color of rhinestones to make your new custom applique come alive with sparkle!
CHOOSE YOUR GLUE

Make sure to read “Sticky Situation” to choose the best glue for your project. For this project we recommend E6000, FabriFuze or Gem-Tac.
CHOOSE YOUR TOOLS

SEND US A PHOTO We would love to help you show off your creation! Please email an upclose photo of your custom applique. We also love receiving photos of the finished product in action. Email reception@rhinestonesunlimited.com