How to Do Simple Crystal Nail Art at Home
Posted by Crystals For Nails on Mar 4th 2020
Crystal nail art is a big trend right now. Of course, you can go to a skilled nail artist and pamper yourself to a top-notch manicure at the salon, but you can also explore creating these nail art patterns and designs at home. If you have an artistic side this is a way to show off some of your skills. It’s also fun! You’ll love the compliments you get each time you bling your nails in an artistic way. Let’s explore how to do simple nail art at home with all the tools and tips you need to get started.
First, just like painting it's all about preparing the surface!
Make sure to remove all polish, push back and remove excess cuticle, shape the tip of the nail and buff the surface of the nail bed. This is where many people go wrong with an at home manicure- really spend time preparing your natural nails properly. Or, go to the salon for the simple manicure or acrylic extensions so you have a beautiful and well-prepared canvas for your ten little works of art!
A couple tips when preparing the nails for nail art. If you have a cuticle that has not been removed from the nail bed the polish will lift and chip causing you to lose your beautiful nail art quickly. Also, the harder the surface of the nail the longer your nail art and crystals will last.
Next, figure out what nail art supplies you want to invest in!
Just like any hobby, you can spend a ton of money on all the fun tools and supplies. Decide what type of nail art you would like and start checking out all the fun things you can spend money on! Save money for the crystals- they are what gives you the most sparkle and may just be the easiest nail art you can do at home.
Here are a few tools and supplies to consider:
Nail Art Tools: Nail Polish Corrector Pen
It’s inevitable when you are doing your nails that you are going to bleed into your cuticles, the sides of your nails, or mess up a bit of your design. It’s easier to correct these little mistakes with a nail polish corrector pen, than with a bottle of polish and a cotton ball. The tip of the corrector pen is more precise to nip those mistakes in the bud.
Nail Art Tools: Striping Tape
Striping tape comes in all different colors that can be fun to add geometric designs to your nails. The striping tape can be left on, or you can use it as a guide to paint your lines and stripes into your nail polish.
Nail Art Tools: Dotting Tool
Polka dots on your nail art is super fun and adorable. With a dotting tool you can do all types of polka dot colors on each of your nails. Usually the dotting tool has a small dot on one end and a larger dot on the other, so you can vary your dot structure.
Nail Art Tools: Striper Brush
A striper brush is a tiny thin paint brush. You can do lines, designs, shapes, and even paint small pictures on your nails with it if you are skilled enough. Here’s a tip when using it with multiple colors, clean the striper brush with nail polish between each one.
Nail Art Tools: Glitter
Sparkly pieces of glitter are always a welcome addition to different nail art designs. When you learn to use the striping tape well, you can make patterns in glitter on your nails for an extra cool look. That usually works best with loose glitter.
Nail Art Tools: Base and Topcoats
Having high quality base and topcoats are important. The base coat can protect your nail bed and help your nail polishes and art adhere much better. Your nail work will last longer too with the right base coat.
A topcoat does protect your nails by helping your polish to dry faster and stay on longer. Both are very important to the process of doing your nail art at home. Don’t skip these two steps.
Nail Art Tools: A Rainbow of Nail Polishes
You’ll want to have a great stock of colors, including metallics, pastels, nudes, and basic colors. Don’t worry about buying these colors all at once. You probably have a great stock of colors at home to begin with. Just start to pick up more colors that you’d like to experiment with any time you're in the mood to buy new shades of nail polish.
Nail Art Tools: UV/LED Gel Curing Lamp
Before you invest in too many polish colors, decide whether you want to invest in a UV/LED gel curing lamp. The gel polish manicures will always last longer. Plus they are simple to use and once cured you will not botch your nails during the long dry times of the past!
Nail Art Tools: Nail Wraps and Stickers
If you aren’t all that confident in doing designs in nail polish, you can always get ready-made nail wraps and stickers to adorn your nails. The wraps and stickers are easy to use because you just press them onto your fingernails. They have adhesive on them, so you don’t have to use any nail glue. Just press and go.
Now it's time for the BLING!


Nail Art Tools: Swarovski Crystals for Nails
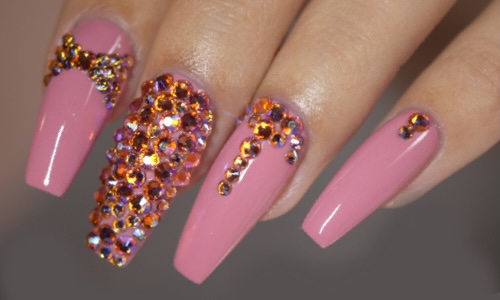
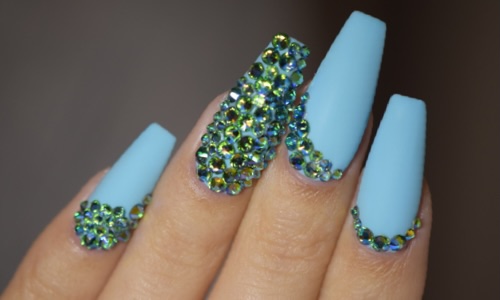
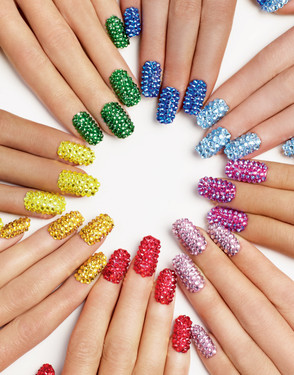
Once you complete your base manicure it is time to add Swarovski Crystals for Nails. Rhinestones come in different shapes, colors and sizes that will truly make your nail art pop. Get creative with it! You can really make your nails a great work of art with Crystals for Nails that shine and sparkle like diamonds when they catch the light.
Did you know that if you invest in the best, Swarovski Crystals For Nails, you can re-use the crystals? Just soak them in acetone to remove any nail glue or gel residue. Then place on your next crystal manicure! It is a reason to go with the real deal. Also, make sure you always buy your Swarovski crystals from a Swarovski Authorized Reseller to make sure you get the real thing. It is amazing the amount of counterfeit Swarovski crystals out there. Buyer beware!
Nail Art Tools: Swarovski Crystalpixie
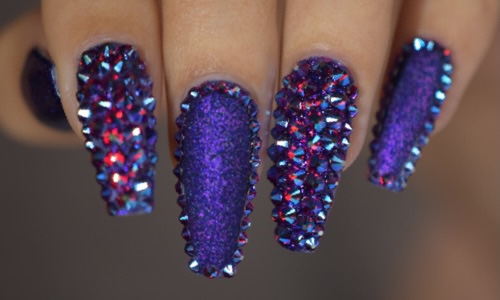
Swarovski makes a stunning product called Crystalpixie. It is like your fingertips are dipped in stardust. A gorgeous look of pave crystals and very easy to apply. Check out our Crystalpixie video blog for a step-by-step tutorial with nail glue or gel adhesive such as GEMGEL Adhesive.
Nail Art Tools: Crystal Rhinestone Adhesive
Nail glue can work for a fun and quick manicure but for a more long lasting nail art manicure you may want to consider our UV/LED curing adhesive GEMGEL Adhesive. You can also use it for other adornments or little domed pearls as accents to your Swarovski Crystal Rhinestones.
Nail Art Tools: Application Mat & Magical Tray
Once you have your tiny little crystals, you will find the need for a couple tools to help with application. First, pick up a Swarovski Crystals for Nails Application Mat or Crystalline Magical Tray. These help to keep the crystals contained and will also help to flip the crystals right side up, so they are easy to pick up with a rhinestone pick up tool. You can also use a small piece of textured paper towel. Just put the crystals on the application mat and run your finger over the top of the crystals to help flip them right side up or place the crystals in the Crystalline Magical Tray or on the paper towel and give a little shake to magically flip them right side up! The magical tray is a must have if you use Swarovski Crystalpixie for your nail art design. Pour the crystals over the nail glue or GEMGEL Adhesive catching the excess in the magical tray. Then use the tray to carefully pour the crystals back into the Crystalpixie bottle.
Nail Art Tools: Rhinestone Pick Up Tools
You can skip a lot of tools but a rhinestone pick-up tool is a must have for bling nail art! Check out the simple Crystalline Pick-N-Stick the Crystalline Pick-Me-Up, the Crystal Tanto or the highest quality tool on the market, the Crystal Katana from Crystal Ninja. Once you have those crystals flipped right side up, simply touch the top of the crystal with a light touch of the tool and place into your nail art design.
Nail Art Tools: Rhinestone Storage
Once you have a collection of crystals in different sizes, shapes and colors, you may want to consider some sort of rhinestone storage solution. Keep those little gems organized for ease when bringing your designs to life!
Practice Makes Perfect with Nail Art
Once you have all the tools at your disposal, it’s easy to create amazing nail art right at home. The more you get into it, the more you’ll be comfortable doing different designs and techniques. Practice makes perfect, but once you get into the swing of doing your own nail art, you’ll find that it’s pretty easy to do.

 Bulk
Bulk Crystal
 Crystals
  Sales &