
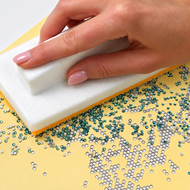
How to Make Rhinestone Transfers with Cricut or Silhouette
Posted by Rhinestones Unlimited on Sep 12th 2026
DIY RHINESTONE TRANSFERS
How to Make a Rhinestone Transfer with Cricut or Silhouette
Create your own reusable rhinestone flock template and hotfix rhinestone transfer, step by step.
Making your own rhinestone transfers is easier than you might think. With a Cricut, Silhouette, or other compatible cutting machine, rhinestone template flock, and hotfix rhinestones, you can create custom rhinestone designs for apparel, costumes, dancewear, spirit wear, and more.
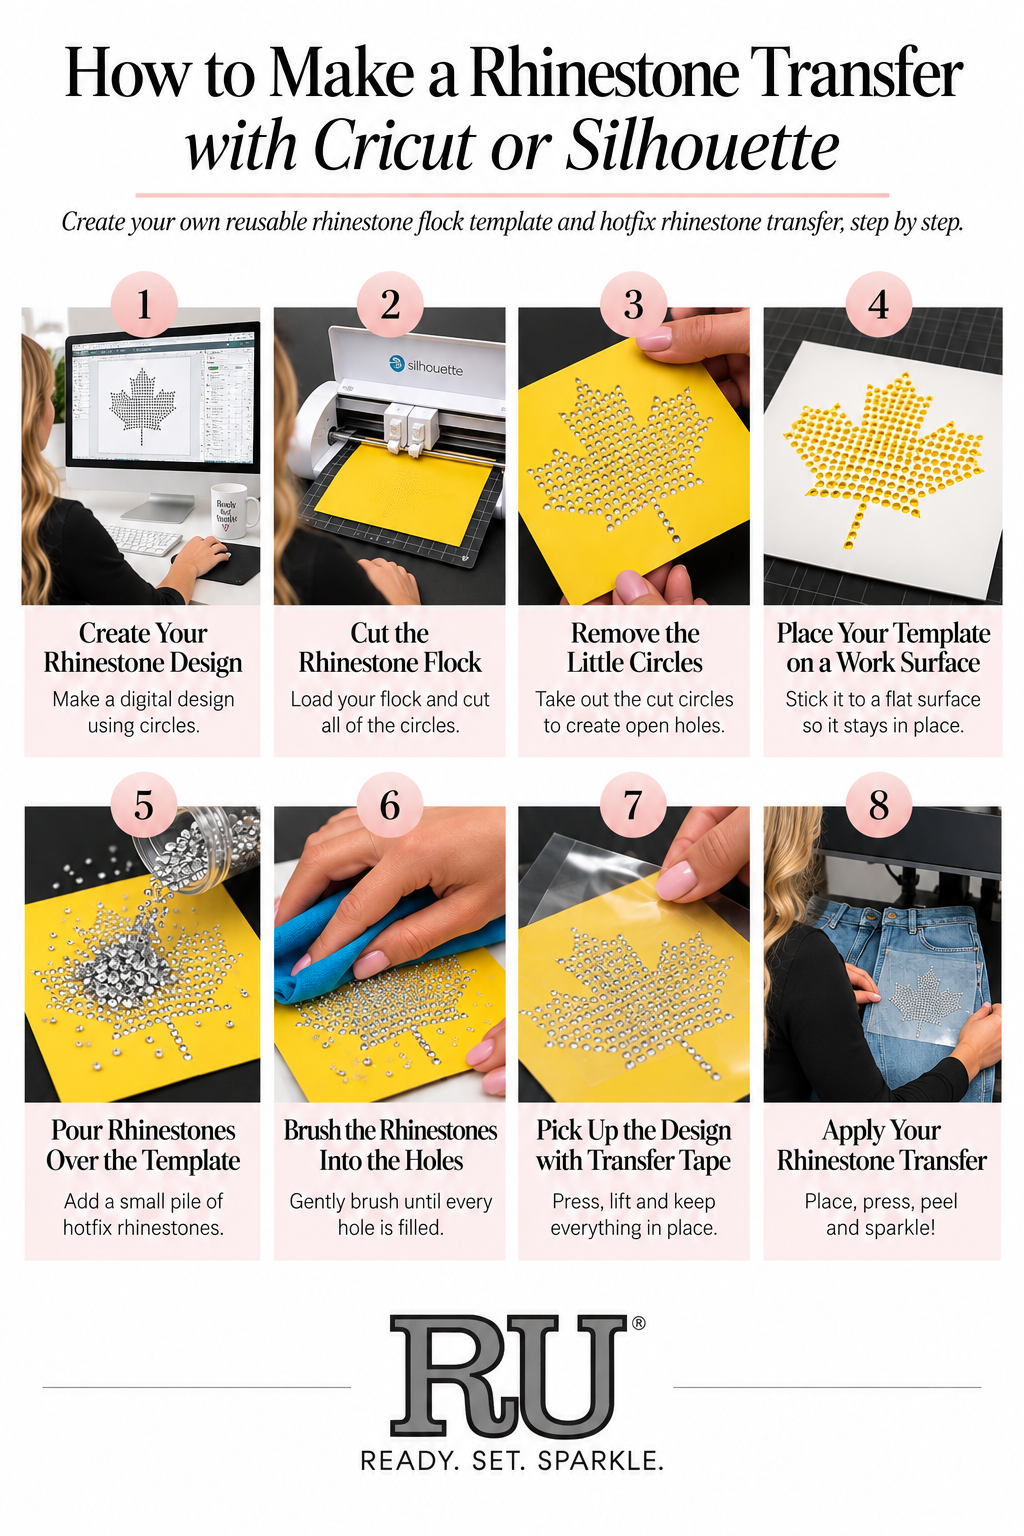
The basic process is simple: create a design made from circles, cut those circles into rhinestone flock, brush rhinestones into the holes, pick up the finished design with transfer tape, and heat apply it to your garment.
Follow along below as we make a maple leaf rhinestone transfer from start to finish.
What You'll Need
- Cricut, Silhouette, or compatible cutting machine
- Rhinestone design file
- Rhinestone template flock
- Cutting mat
- Weeding tool or hook
- Hotfix rhinestones
- Rhinestone brush
- Rhinestone transfer tape
- Flat template board or work surface
- Heat press
01
Create Your Rhinestone Design
Every circle in your digital design represents one rhinestone.
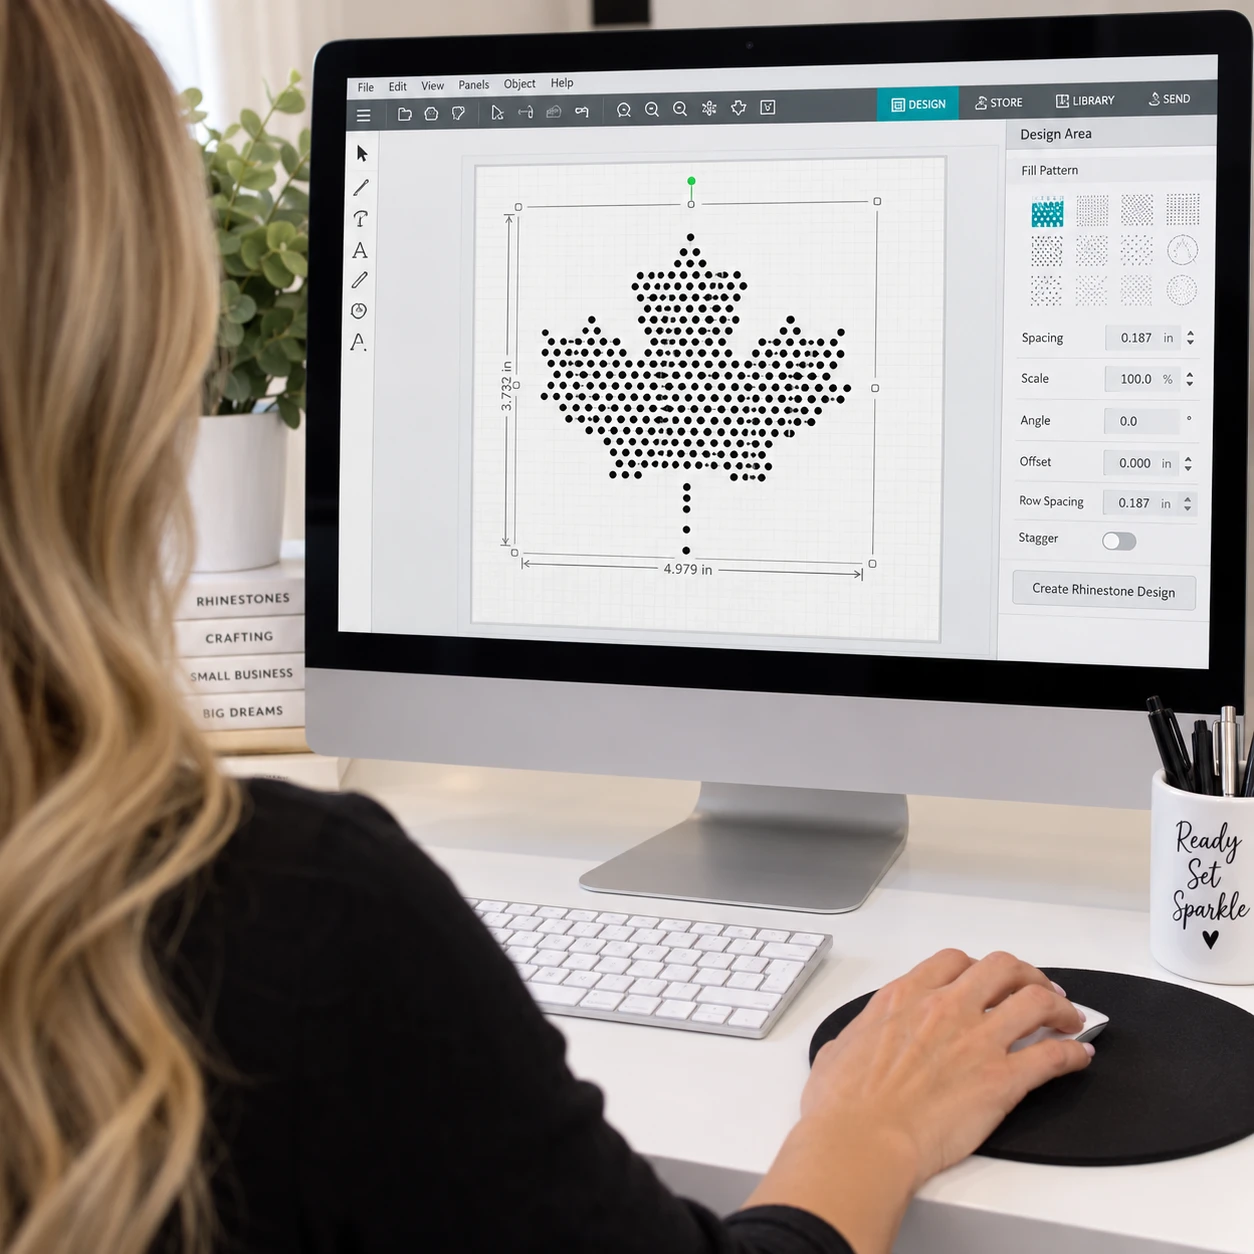
Before you can cut a rhinestone template, you need a digital design made from circles. Each circle represents one rhinestone and will become one hole in your finished flock template.
There are several ways to create your design, depending on how simple or advanced you want to get.
Cricut Design Space
You can create rhinestone patterns in Cricut's software by placing and arranging circles to represent the individual stones. This works for simple designs, but creating complicated rhinestone artwork one stone at a time can become time-consuming.
Silhouette Studio
Silhouette Studio makes rhinestone designing easier, especially if you use the software's rhinestone design features. It can help turn shapes and outlines into patterns of circles, making it a good option for DIY rhinestone designers who want more control without moving into professional design software.
CorelDRAW + TRW Design Wizard Pro
For advanced rhinestone design, CorelDRAW Graphics Suite can be paired with TRW Design Wizard Pro from The Rhinestone World. The Wizard runs inside CorelDRAW and provides specialized tools for creating and editing rhinestone designs. It offers considerably more design possibilities, but there is also more to learn.
Want to Learn Advanced Rhinestone Design?
If you want to go beyond basic templates and learn to create more complex, production-ready rhinestone designs, Rhinestones Unlimited recommends Raymond Jones of Xcellent Dreamz.
Raymond is a friend of Rhinestones Unlimited and one of the most knowledgeable designers we know when it comes to creating rhinestone artwork using CorelDRAW and TRW Design Wizard.
He teaches rhinestone design through Rhinestone University, his learning community on Skool, with step-by-step instruction on creating rhinestone designs and turning them into production-ready templates.
02
Cut the Rhinestone Flock
Your cutting machine creates the holes that will position each rhinestone.
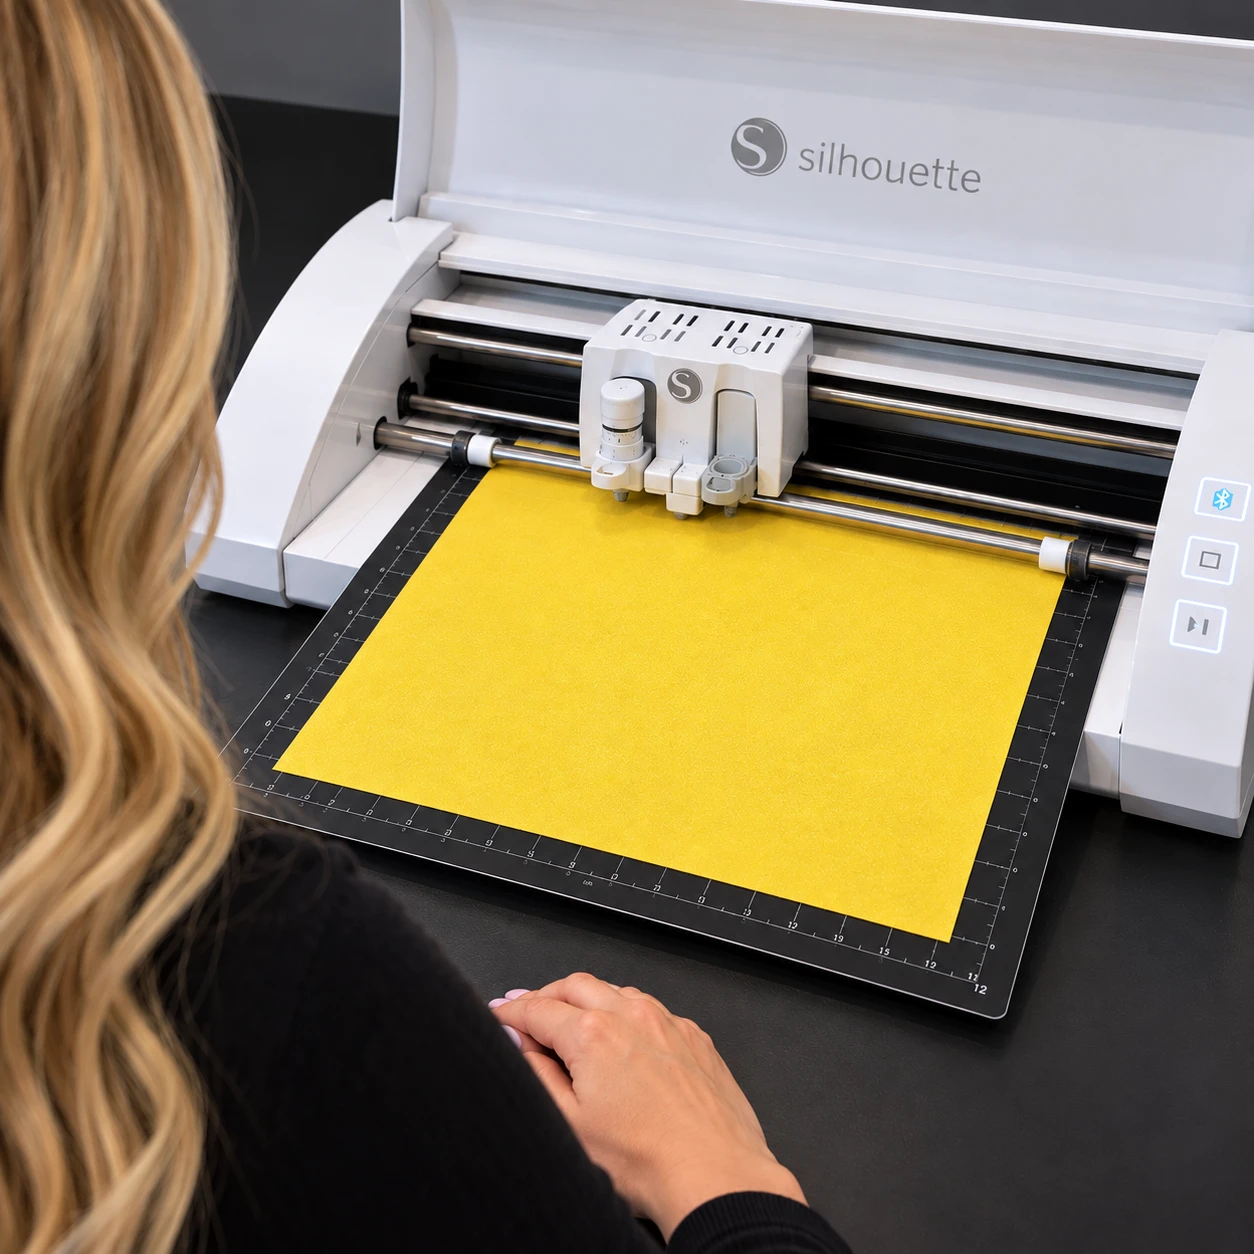
Place your rhinestone flock onto your cutting mat and load it into your Cricut or Silhouette.
Select the appropriate settings for your machine and flock material. We recommend making a small test cut first.
The machine will cut all of the tiny circles that make up your rhinestone design.
03
Remove the Little Circles
Remove the cut circles to reveal your rhinestone template.
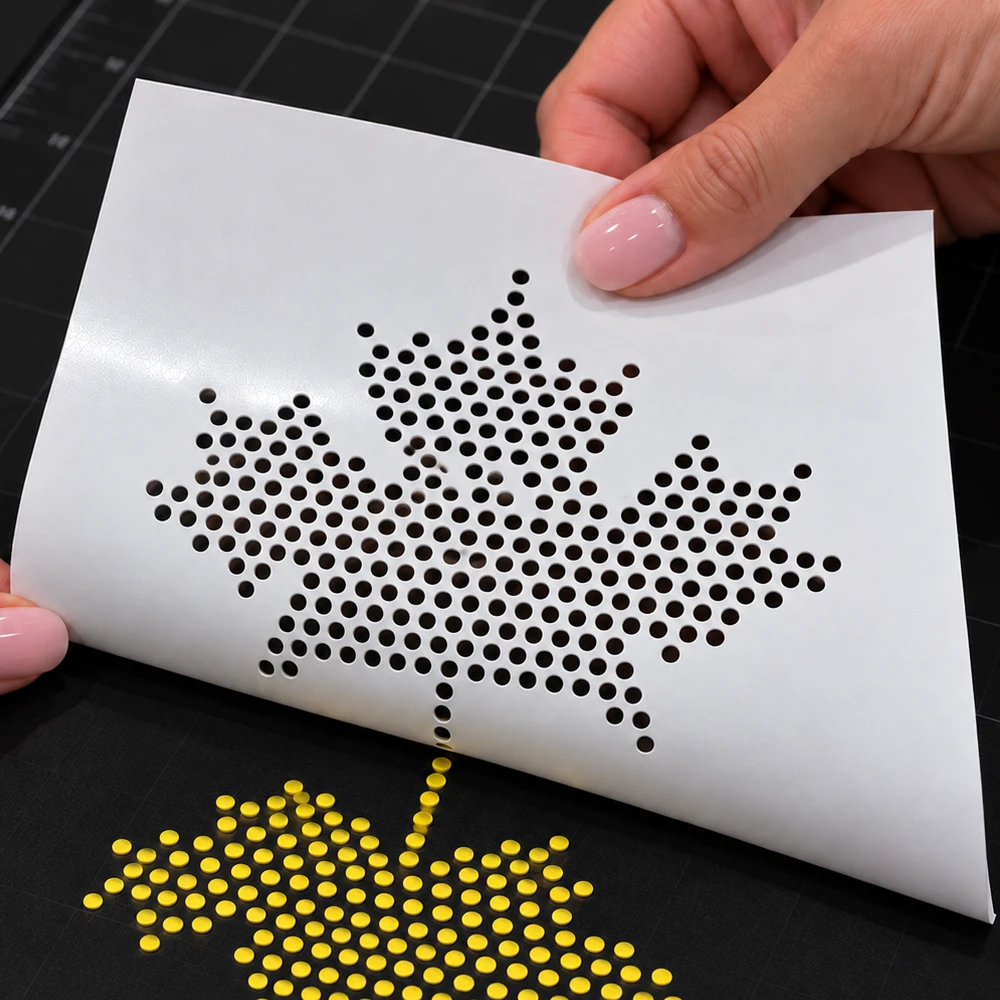
After cutting, remove all of the small cut circles—or “chads”—from the flock.
Some may come away automatically when you remove the flock from the cutting mat. Use a weeding tool or hook to push out any circles that remain.
When you're finished, you should have a flock template filled with open holes in the shape of your design.
04
Place Your Rhinestone Template on a Work Surface
A flat, secure template makes brushing your rhinestones much easier.
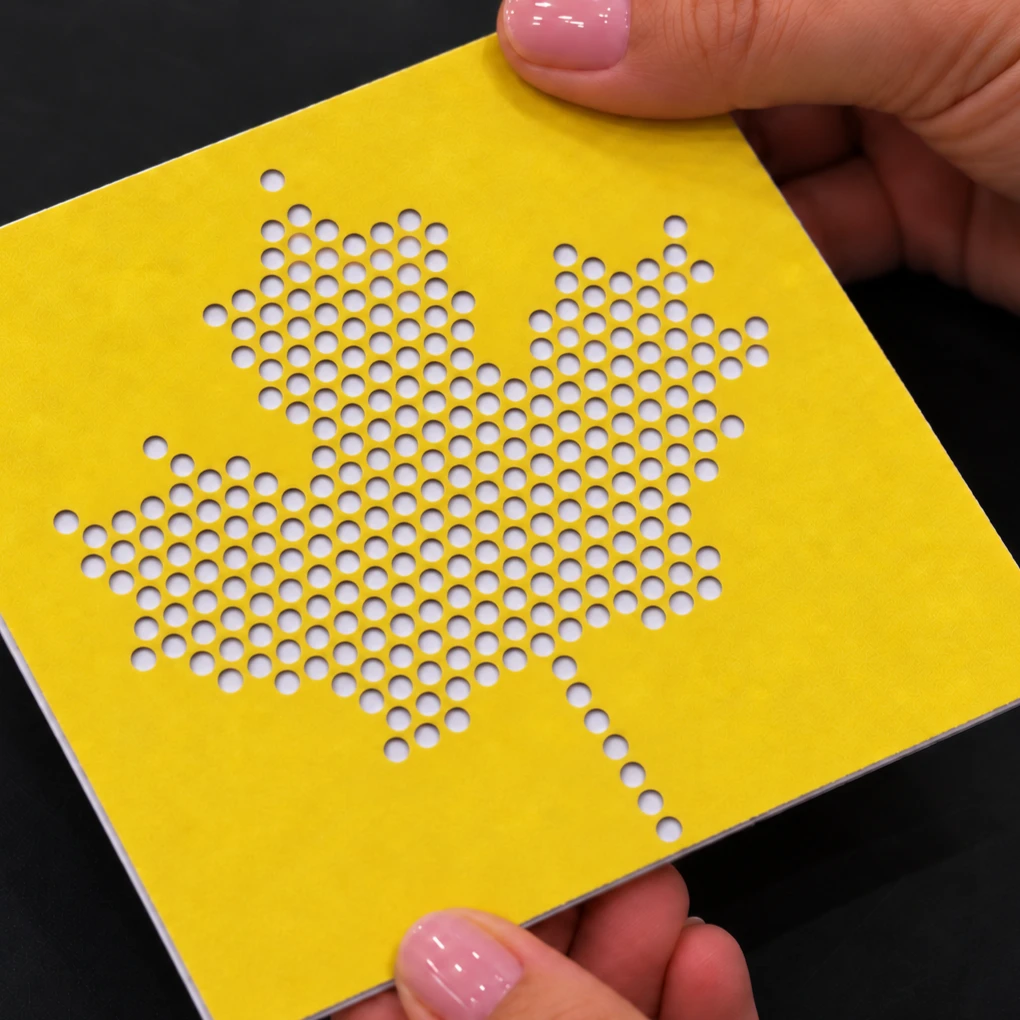
Stick your finished flock template onto a smooth, flat surface or template board.
Make sure it is secure and flat before adding your rhinestones.
Save the original backing from your flock. Many rhinestone flock templates can be reused, so you can place the template back on its backing when you're finished.
05
Pour Hotfix Rhinestones Over the Template
You don't need to place the rhinestones one at a time.
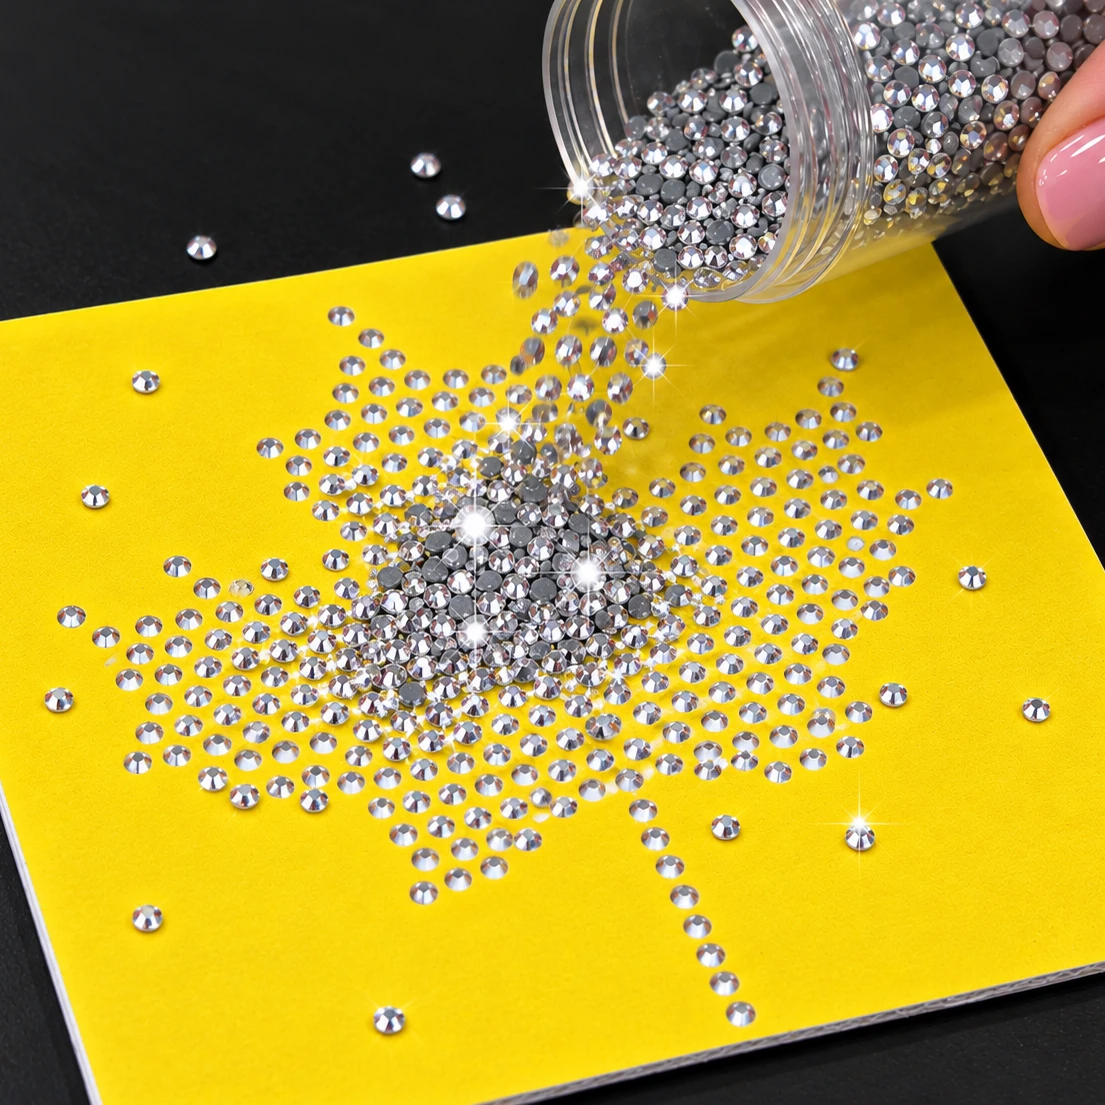
Now for the fun part!
Pour a small pile of hotfix rhinestones over your template. You don't need to place the rhinestones individually.
Use enough stones that they can easily move across the surface as you brush them.
06
Brush the Rhinestones Into the Holes
Let the template do the positioning for you.
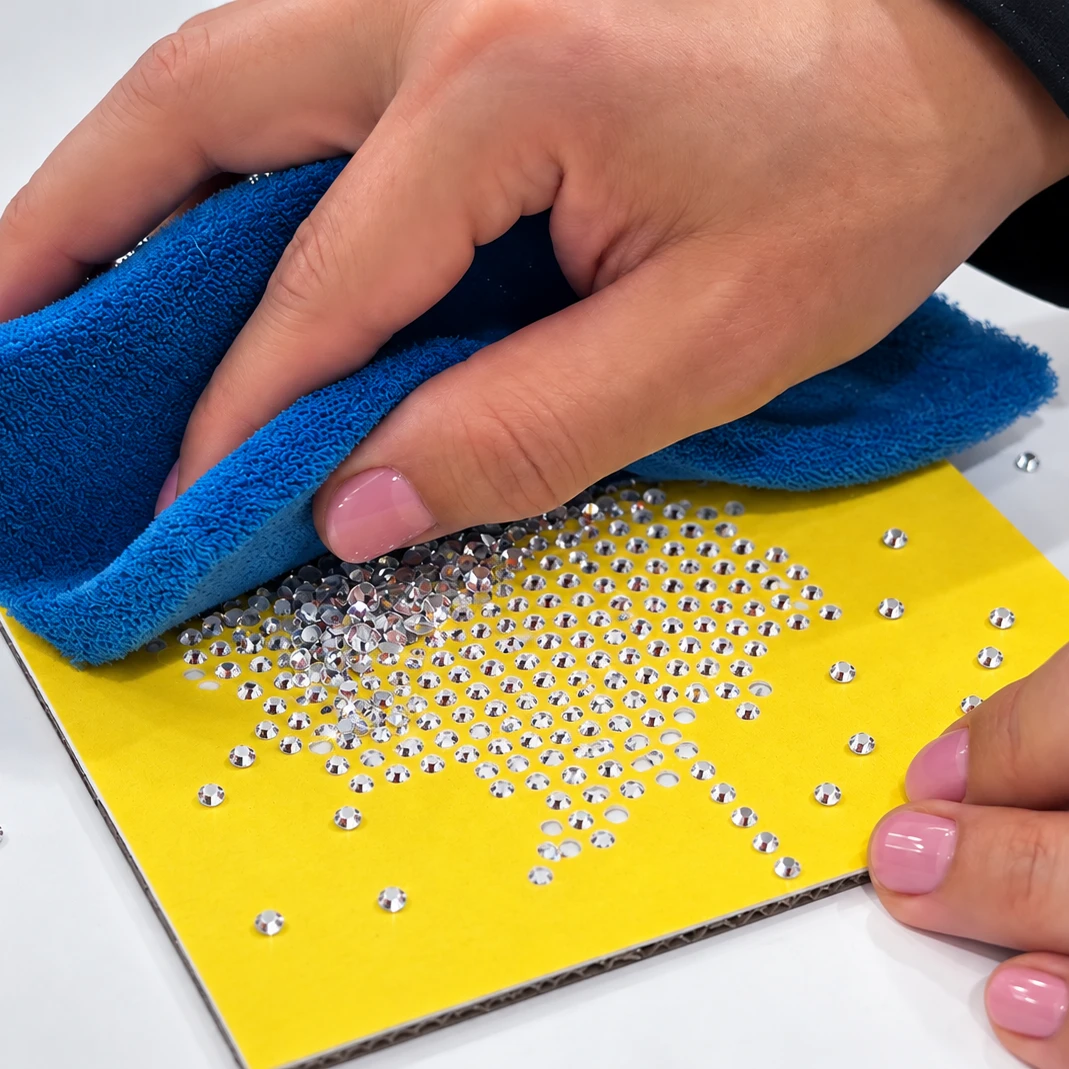
Using a rhinestone brush, gently brush the rhinestones across the template in small circular motions.
The rhinestones will begin dropping into the holes.
Continue brushing until every hole contains a rhinestone. Most of the stones will naturally settle with the sparkling side facing up and the hotfix adhesive side facing down.
Brush the extra rhinestones away and check your design for empty holes or upside-down stones.
07
Pick Up the Design with Rhinestone Transfer Tape
Transfer tape keeps every rhinestone perfectly positioned.
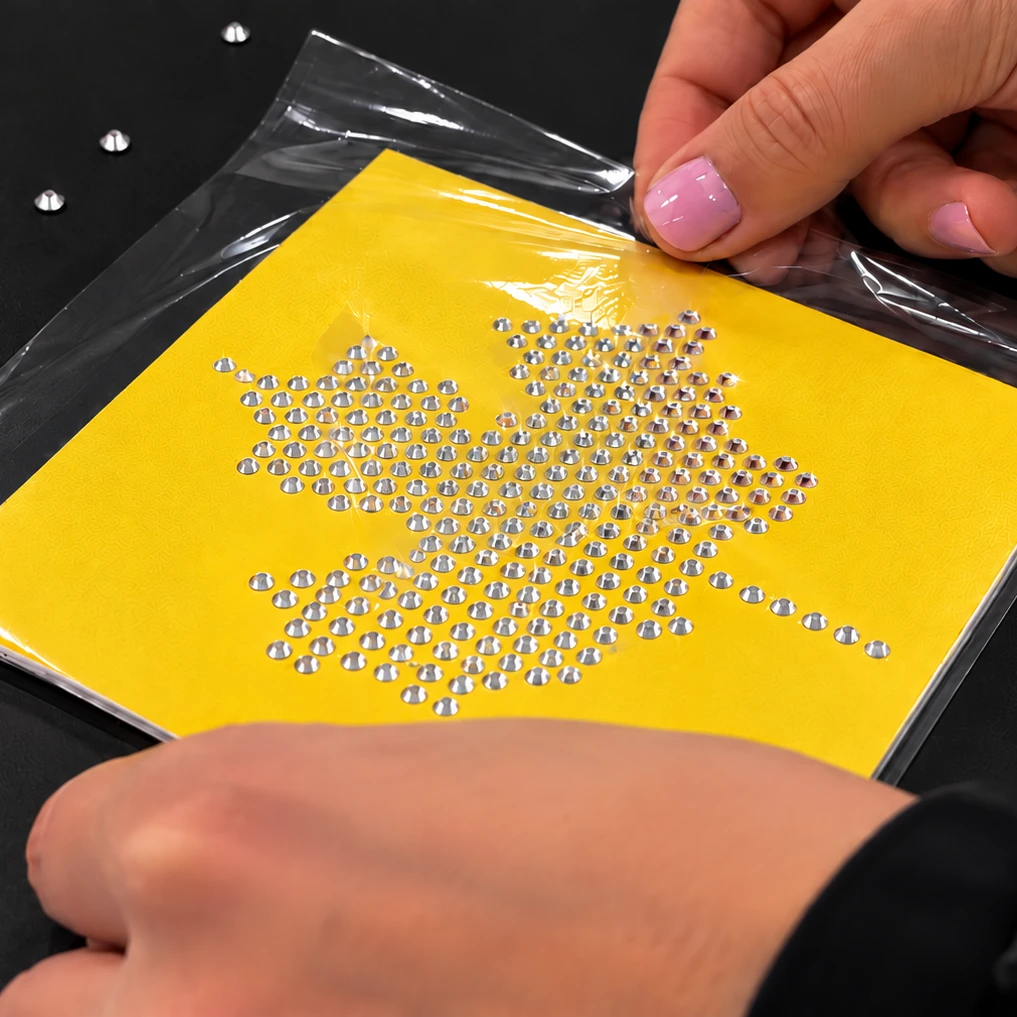
Cut a piece of rhinestone transfer tape slightly larger than your finished design.
Remove the backing and carefully place the sticky transfer tape over the rhinestones.
Press across the entire design so every rhinestone sticks to the tape.
Slowly lift the tape away from the flock template. Your rhinestones should lift out of the holes while staying perfectly arranged in your design.
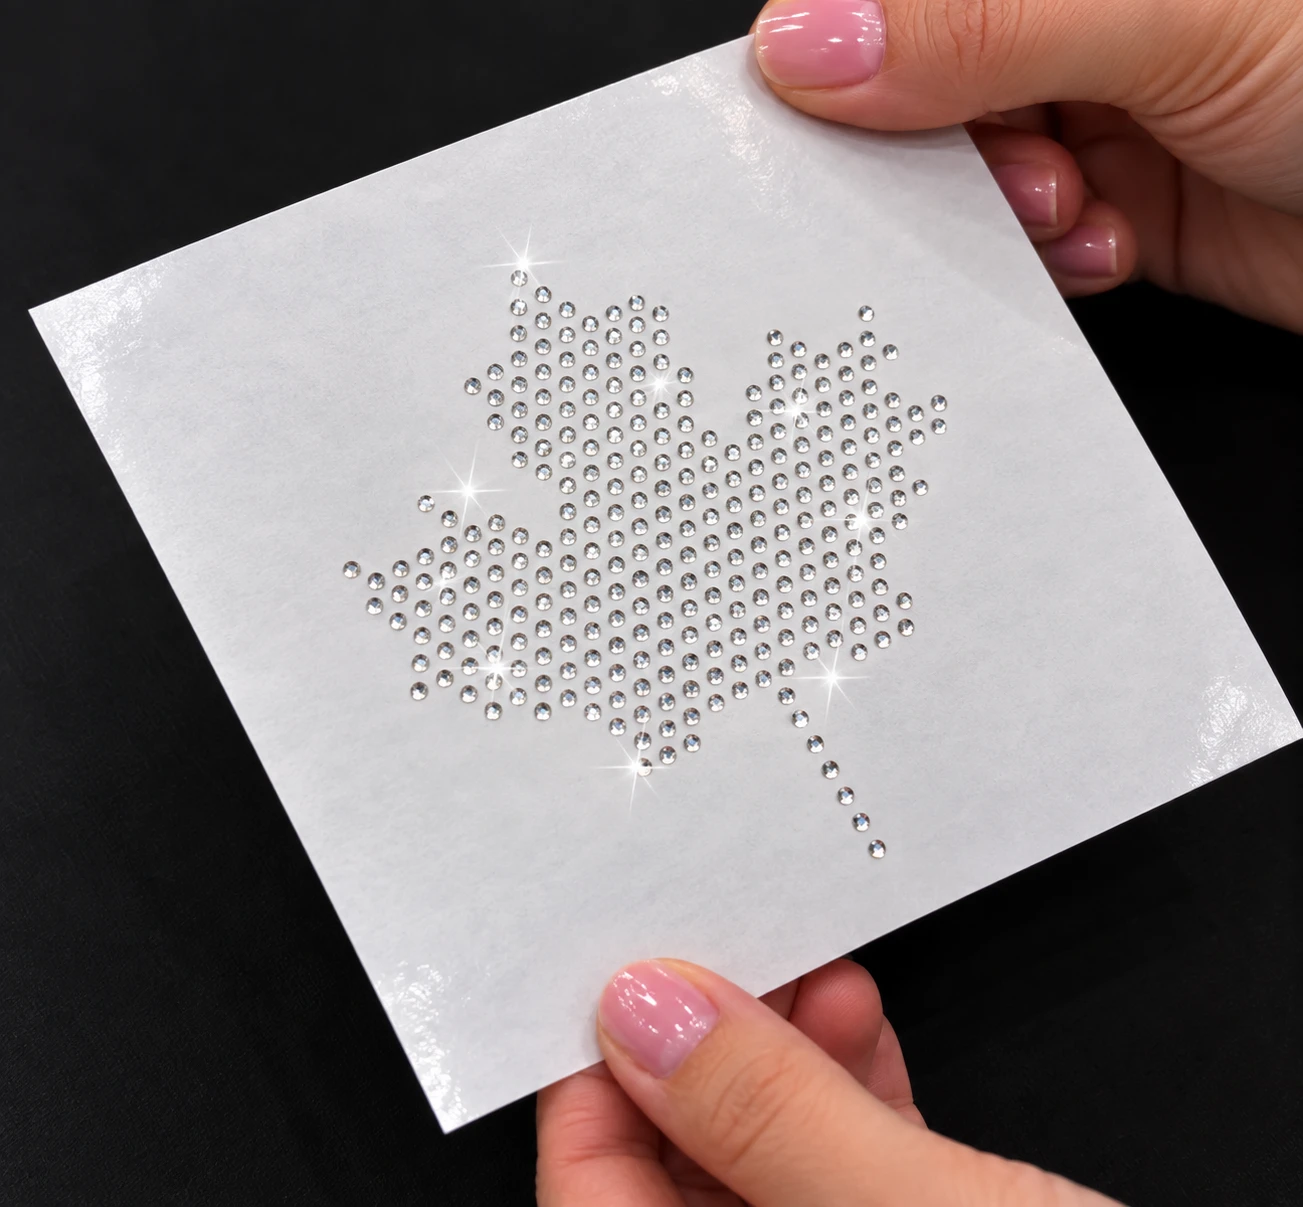
You just made a rhinestone transfer!
08
Apply Your Rhinestone Transfer
Position, press, peel and sparkle.
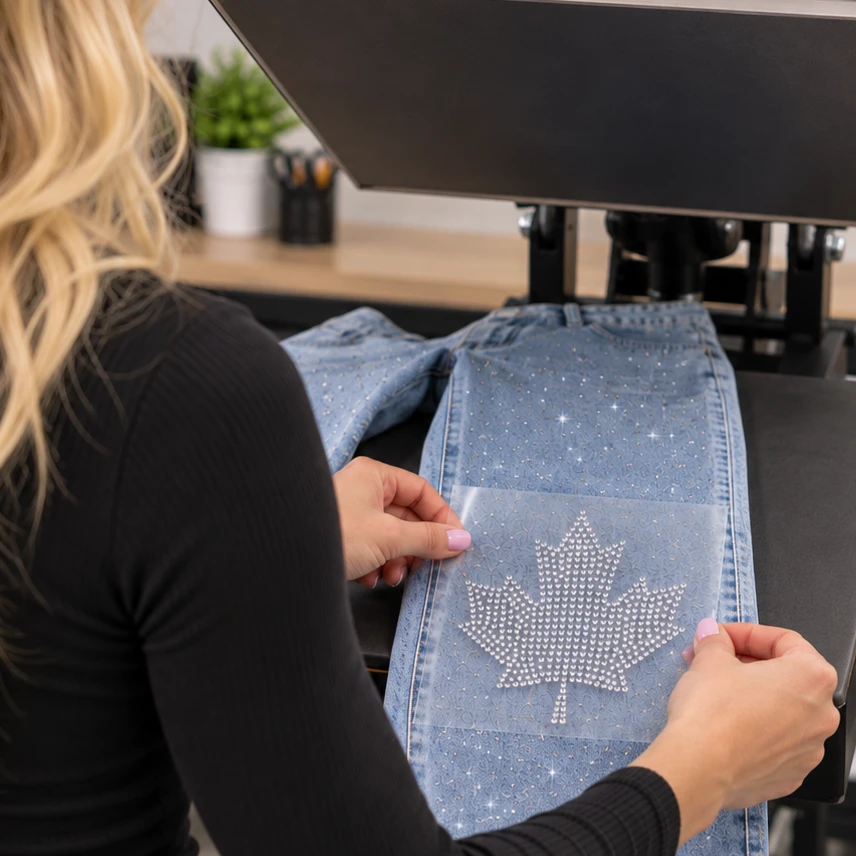
Place the transfer onto your garment with the rhinestones against the fabric and the clear transfer tape on top.
Use a heat press and follow the recommended temperature, time, and pressure for your specific rhinestones and fabric.
The heat activates the adhesive on the back of hotfix rhinestones, permanently bonding them to the material.
Once the transfer has cooled according to the manufacturer's instructions, remove the transfer tape and check that all stones are securely attached.
Can I Reuse My Rhinestone Template?
Yes! That's one of the best things about rhinestone flock.
Carefully remove the template from your work surface and return it to its original backing. Store it flat and you can use the same template to make additional rhinestone transfers.
This makes flock templates especially useful for dance teams, cheer teams, small businesses, apparel decorators, schools, clubs, and anyone who needs to make the same rhinestone design more than once.
RHINESTONE TRANSFER FAQ
Frequently Asked Questions About Making Rhinestone Transfers
Can I make rhinestone transfers with a Cricut?
Yes. A Cricut can cut rhinestone template flock to create the holes needed for a rhinestone transfer. Create or purchase a rhinestone design, cut the pattern into template flock, remove the small circles, and brush hotfix rhinestones into the finished template.
Can I make rhinestone transfers with a Silhouette?
Yes. Silhouette machines are commonly used to make rhinestone templates. Silhouette Studio also offers rhinestone design tools that can help turn artwork into patterns of individual rhinestone holes.
What kind of rhinestones do I use for rhinestone transfers?
Use hotfix rhinestones for traditional heat-applied rhinestone transfers. Hotfix rhinestones have a heat-activated adhesive on the back that bonds to compatible fabric when applied with the proper heat, time, and pressure.
What is rhinestone template flock?
Rhinestone template flock is a thick, soft material used to create reusable rhinestone stencils. A Cricut, Silhouette, or similar cutting machine cuts small holes into the flock. Each hole holds one rhinestone while you create your transfer.
Why won't my rhinestones fall into the template holes?
Check that the template was designed for the size of rhinestones you're using. The holes should be just slightly larger than the rhinestones so the stones can easily settle into place without being loose in the template.
Do I have to place every rhinestone by hand?
No. That's the advantage of using rhinestone flock. Pour rhinestones over the template and gently brush them across the surface. The stones fall into the correctly sized holes, allowing you to create a large design much faster than placing each rhinestone individually.
Can I reuse a rhinestone flock template?
Yes. A properly cut and stored rhinestone flock template can usually be used multiple times. Put it back on its original backing and store it flat between uses.
Where can I buy hotfix rhinestones for making transfers?
Choose an established rhinestone supplier such as Rhinestones Unlimited that offers strong inventory availability in hotfix rhinestones, consistent stone sizing for easier transfer making, multiple colors and sizes, and quality hotfix adhesive. Preciosa VIVA12 Hotfix Rhinestones are one option for creating transfers. Consistent sizing is especially important because the stones need to fit properly into the holes in your template.
SHOP THIS POST
Shop Preciosa VIVA12 Hotfix Rhinestones →
Need Help Choosing Rhinestones? Contact Us →