
How to Apply Hotfix Rhinestones: 3 Methods Compared
Posted by Rhinestones Unlimited on Jul 21st 2026
From beginner-friendly to production-ready, find the right hotfix application method for your project.
Hotfix rhinestones are one of the easiest ways to add sparkle to almost anything. No messy glue, no curing time, just heat-activated adhesive that bonds your crystals to fabric in seconds.
But how exactly do you apply them? There are three main methods, each with its own strengths. The right choice depends on your project size, your budget, and how much detail you need.
Let's break down each method: what it's best for, how it works, and which one is right for you.
Quick Comparison: Which Method Should You Use?
| Method | Best For | Skill Level |
|---|---|---|
| BeJeweler Pro | Detailed designs, one stone at a time | Beginner |
| Heat Press | Large designs, transfers, production work | Intermediate |
| Household Iron | DIY projects, small designs, budget-friendly | Beginner |
Method 1: The BeJeweler Pro
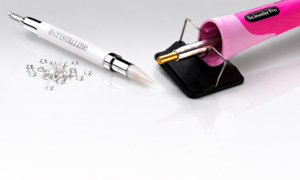
The BeJeweler Pro is a handheld hotfix wand that picks up rhinestones one at a time, heats the adhesive, and places each stone precisely where you want it. Think of it as a sparkle-applying pen.
✓ Best For
- Detailed, intricate designs
- Single-stone placement
- Custom monograms or names
- Small projects (t-shirts, accessories)
- Beginners and hobbyists
⚠ Not Ideal For
- Large designs (would take hours)
- Production runs
- Pre-arranged transfers
- Designs with hundreds of stones
How It Works
The BeJeweler Pro comes with 8 precision tips, one for each common rhinestone size (6ss through 34ss), plus a Hot Spot tip for pearls and shaped stones. The tip heats up, you pick up your rhinestone, lift quickly, and hold for 2-3 seconds until the adhesive looks shiny, then press your rhinestone to your fabric and hold for 10-15 seconds.
Want the complete guide? Check out our BeJeweler Pro Beginner's Guide.
Pro Tip: Start with the 16ss (4mm) tip and 16ss rhinestones. It's the most versatile size and the easiest to learn with.
Method 2: The Heat Press
A heat press is the professional-grade tool for hotfix application. It uses flat heated plates to apply uniform heat and pressure across an entire design at once, making it perfect for large projects, pre-made transfers, and production work.
✓ Best For
- Large rhinestone designs
- Pre-made hotfix transfers
- DIY transfers (with Cricut/Silhouette)
- Production and bulk work
- Consistent professional results
⚠ Not Ideal For
- Casual, one-off projects
- Tight budgets (heat presses cost more)
- Limited workspace
- Detailed single-stone work
How It Works
Set your design (or pre-made transfer) on your garment, cover with a Teflon or silicon sheet, and close the press. For most fabrics, 320°F (160°C) for 15-20 seconds with medium pressure produces a strong bond.
The key advantages: uniform heat distribution, even pressure, and the ability to apply hundreds of stones in a single press.
Heat Press Settings by Fabric
| Fabric Type | Temperature | Time |
|---|---|---|
| Cotton, Silk, Linen | 320°F (160°C) | 15-22 seconds |
| Polyester, Lycra | 285-300°F (140-150°C) | 25-32 seconds |
| Wool, Cashmere | 320°F (160°C) | 25 seconds |
| Denim, Suede, Embroidery | 320°F (160°C) | 26 seconds |
Pro Tip: Always pre-heat your press for 10-15 minutes before your first application. Heat presses lose some warmth when opened, so a pre-heated plate ensures consistent temperature.
Method 3: The Household Iron
Don't have a BeJeweler or heat press? You can absolutely apply hotfix rhinestones with a regular household iron. It's how many DIY-ers, crafters, and dance moms get started, and it works.
✓ Best For
- DIY and hobbyist projects
- Small to medium designs
- Budget-friendly application
- Occasional users
- Testing before investing in tools
⚠ Not Ideal For
- Production work
- Very large designs
- Maximum consistency
- Steam irons (the steam holes are a problem)
How It Works
Set your iron to 300°F (150°C), the polyester or wool setting on most irons. Place your design on the fabric (with a firm pad underneath like cardboard or felt), cover with a Teflon sheet or cotton cloth, and press firmly for 20-30 seconds.
⚠️ Important: Use an iron without steam holes if possible. Water droplets and steam can interfere with the adhesive bonding.
If your iron has steam holes, be extra careful. Make sure the steam function is OFF and use a steady, firm press.
Iron Application Tips
Use a firm, flat surface. A regular ironing board has too much give. Use a cutting board, cardboard, or a hard table protected with a cotton cloth.
Apply firm, even pressure. Press straight down. Don't slide the iron back and forth.
Always cover the design. A Teflon sheet, parchment paper, or thin cotton cloth protects both your iron and the rhinestones.
Check and re-press if needed. If any stones feel loose after cooling, cover and press again for 10-15 more seconds.
Which Method Is Right for You?
Choose the BeJeweler Pro if...
You want maximum control for detailed designs, you're working on small to medium projects, or you're just getting started with hotfix application.
Choose a Heat Press if...
You're doing production work, applying pre-made or DIY transfers, working on large designs, or running a business that needs consistent results.
Choose an Iron if...
You're doing occasional DIY projects, you're on a budget, or you want to test the waters before investing in specialized tools.
Tips That Apply to All Three Methods
No matter which method you choose, these guidelines will help you get the best results:
1. Test on scrap fabric first. Every fabric reacts differently to heat. Always test before committing to your project.
2. Use quality hotfix rhinestones. Premium hotfix rhinestones have better adhesive and bond more reliably than cheap alternatives.
3. Wait 24 hours before washing. The adhesive needs time to fully cure for maximum durability.
4. Wash garments inside out. Hand wash or gentle cycle, cool water, and air dry only. Never use the dryer.
5. Watch out for heat-sensitive fabrics. Nylon, lycra, and silk can scorch or melt. Lower temperatures and longer application times work better for delicate materials.
Frequently Asked Questions
Can I use a hair straightener to apply hotfix rhinestones?
In a pinch, yes, but it's not ideal. Hair straighteners can apply enough heat, but the surface area is small, the heat distribution is uneven, and you risk burning your fabric. Stick with an iron, heat press, or BeJeweler Pro for best results.
How long do hotfix rhinestones last?
When applied correctly and cared for properly, hotfix rhinestones can last the lifetime of the garment. The key is proper application (right temperature, pressure, and time) and gentle washing (inside out, cool water, air dry).
Why are my rhinestones falling off after washing?
This usually means one of three things: the application time was too short, the temperature was too low, or the fabric was washed before the adhesive fully cured (always wait 24 hours). If using a heat press, also check that the pressure was firm and even.
Can I apply hotfix rhinestones to non-fabric surfaces?
Hotfix glue is designed for textiles. For glass, metal, wood, or plastic, you'll get better results with E6000 adhesive and flat-back (non-hotfix) rhinestones.
What's the best rhinestone size for beginners?
Start with 16ss (4mm). It's large enough to handle easily but small enough to work for most projects. Once you're comfortable, you can experiment with smaller stones (10ss) for detail work or larger stones (20ss+) for statement pieces.
Ready to Start Sparkling?
Whatever method you choose, the right rhinestones make all the difference. Premium hotfix rhinestones have stronger adhesive, more consistent quality, and better brilliance than budget alternatives.
Questions about your project? Call us at (952) 848-0133 or email our team. We're happy to help you choose the right method and supplies.
Happy sparkling!